Showing posts with label c and c in the kitchen. Show all posts

June 11, 2018

C&C in the Kitchen: Strawberry Oat Banana Bread

On Thursday I picked two flats of strawberries totally 14 lbs. This is the second time in the last two weeks that we've been to our favorite local farm, Columbia Farm, to pick. They have the most amazing berries...raspberries and blueberries will start soon, and it's a weekly event for us to pick there during berry season.

I'm often asked what we do with the berries....make jam, freeze them? Usually we just eat them, all of them. This time, however, I noticed that they were getting moldy faster than we could eat them, so I decided to make something.

Yesterday the Mini and I made strawberry banana bread! It was so good that we've eaten the whole pan already, and I thought I would share the recipe.

This ingredients are healthy, easy to have on-hand and the recipe would work with many other fruits and adds ons, such as chocolate chips, nuts, coconut, etc. This is going to be a new staple in our house.

STRAWBERRY OAT BANANA BREAD
Wet Ingredients
2 ripe medium sized bananas, mashed
2 eggs
1/3 cup drippy nut butter (I used peanut butter)
1 tablespoon honey or maple syrup
1 tablespoon coconut oil, melted and cooled


Dry Ingredients 
3/4 cup oat flour (oatmeal food processed)
1 teaspoon baking powder
1 teaspoon salt

Additional items
1/2 cup strawberries or any other fruit

Instructions
1. Preheat oven to 350 degrees. Grease loaf pan or line with parchment paper.
2. Mix wet ingredients with mixer
3. Add dry ingredients
4. Fold in strawberries
5. Bake for  35-40 minutes
6. Let cool and enjoy


January 31, 2018

C&C in the Kitchen

When I saw this recipe on Making Thyme for Health for Flourless Vegan Gluten-free Double Chocolate Banana Bread I knew I had to try it.

Here's what her bread looked like.
Flourless Vegan Double Chocolate Banana Bread- made in a blender with rolled oats and cocoa powder, you would never guess this banana bread is gluten-free and oil-free!

And here's mine!


Truth be told, in the chaos of baking with two first graders, we completely forgot the coconut oil, but it turned out totally fine. I did add slightly more almond milk to the blender which was likely to compensate for less liquid.

And there is also a recipe for a plain version that is next on my list (here). Try them both! You won't be sorry!

Flourless Vegan Gluten-free Double Chocolate Banana Bread

INGREDIENTS:
2 medium-size ripe bananas
1/4 cup Almond milk
1/4 cup pure maple syrup
1/4 cup unsweetened creamy peanut butter
2 teaspoons vanilla extract
1 and 3/4 + 1/2 cup rolled oats, divided
1 teaspoon cinnamon
2 teaspoons baking powder
1/2 teaspoon baking soda
1/4 teaspoon salt
1 tablespoon melted coconut oil
1/2 cup dark chocolate chips

DIRECTIONS:
Grease or line a loaf pan then preheat the oven to 350°F.

Starting with the bananas and working down to the list to the melted coconut oil, place all of the ingredients (except for 1/2 cup rolled oats and dark chocolate chips) in a blender. Blend on high for about 10 seconds, until a smooth batter forms. It’s okay if it’s not perfectly smooth. You don’t want to over blend the batter or it could become gummy.

Add the remaining oats and the chocolate chips to the blender and stir everything together with a spoon. (I didn't add the extra oats and layered in the chocolate chips once I poured it into the pan). Pour the batter into the loaf pan and bake for about 30 minutes, or until golden brown. A knife should come out clean when you stick it into the center of the loaf.

Allow to cool for at least 15 minutes before removing from the pan. Store leftovers in an airtight container in the refrigerator for up to 3 days.

January 25, 2018

C&C in the Kitchen

At the request of a friend and C&C reader (KWK), I am going to share with you one of my favorite pasta recipes. Another C&C friend and reader (hi Edith) sent me a link to this incredible pasta recipe which we made two substitutions to....spinach for kale and chicken sausage for pork sausage. 

Try it! You won't be sorry.

Pasta With Butternut Sauce, Spicy Sausage and Kale 

Pasta in a a decadent creamy sauce made from butternut squash, no need for cream! The spicy chicken sausage and sage is the perfect compliment, this pasta dish is filling and comforting on a chilly night.

Ingredients
11 oz (4 links) spicy Italian sausage (they called for chicken, I used pork). 
1 lb butternut squash, peeled and diced (I used 2 bags pre cut from trader joes)
1 tbsp whipped butter
10 oz pasta, wheat or gluten-free (or regular)
1/4 cup shallots, minced
3 cloves garlic, minced
2 cups lacinato kale, roughly chopped
2 tbsp fresh shaved parmesan cheese
4 sage leaves, sliced thin
kosher salt and freshly ground black pepper, to taste

Directions
- Bring a large pot of salted water to a boil. Add butternut squash and cook until soft.
- Remove squash with a slotted spoon and place in a blender, blend until smooth.
- Add pasta to the boiling water and cook according to package directions for al dente, reserving at least 1 cup of the pasta water before draining.
- Meanwhile, in a large deep non-stick skillet, sauté sausage over medium heat until browned, breaking up with a spoon as it cooks. When cooked through, set aside on a plate.
- Reduce heat to medium-low and melt the butter, sauté the shallots and garlic until soft and golden, about 5 – 6 minutes.
- Add pureed butternut squash, season with with salt and fresh cracked pepper and add a little of the reserved pasta water (I used about 1 cup) to thin out the sauce to your liking.
- Add kale and stir in parmesan cheese and sage. Toss in cooked pasta and sausage and mix until well coated.
- Serve with additional parmesan cheese on the side if desired.

December 18, 2017

C&C in the Kitchen

Last week I hosted a holiday luncheon and cookie exchange, so I thought I would share what I served and the cookies I exchanged. I decided to keep it simple and serve soup and bread. I made two soups, the first a butternut squash, leek & apple soup from My New Roots.
butternutsoup4

And the second, one of my favorites, Thai sweet potato and carrot soup from The Wanderlust Kitchen. 
Thai Sweet Potato and Carrot Soup Recipe - a hearty and delicious soup in under 30 minutes!

I made three types of cookies: 

Peppermint Brookies from Weelicious which were so dang good and were a big hit with the Mini Fashionista. 

Peanut Butter Blossoms from Hummusapien which were equally as delicious. The Mini especially loved helping with these. Unwrapping the kisses and placing them on the cookies was the perfect job for a 6 year old. 

And lastly, I had to include one "healthy" cookie, so I decided on these gingerbread chocolate chip almond butter cookies from Recipe Runner that are paleo and gluten free. I was a bit skeptical of how they would turn out, but they were super moist and tasty (although mine looked nothing like this picture)!

I highly recommend trying all of these recipes! I will be adding them all to my list of favorites. 


November 13, 2017

Trader Joe's Favorites

For those of you with a Trader Joe's nearby, you definitely want to read this post. Today I'm sharing some of my favorite TJ's items. 

These are my new favorite "healthy sweet treat". They are made of dark chocolate, honey and mint! That's it! So simple and so good. 

I have been eating this red pepper spread on nearly everything....eggs, rice cakes with avocado, salad. It's very low in sugar, and it's delicious! We go through nearly a jar a week.

Katie turned me on to this tasty curry cauliflower quinoa salad. It is sweetened with a little honey but still only has 2g added sugar per serving. 

After spending 3 weeks in Europe this summer I have been on a bit of a muesli kick. This one is simple, has no added sugar and is super tasty! 

I've been enjoying it with the TJ's Plain Icelandic Yogurt. 

My husband is the cook in our house, and he's very particular about his cooking products. Apparently he's done some research, and this Trader Joe's California Estate olive oil is the best quality for the price. 

Lastly, these are one of the Mini Fashionista's favorite snacks. They are far less expensive than similar products and are somewhat nutritious...as far as snacks in a package go. 

So, what are you favorite TJ's products?

November 9, 2016

C&C in the Kitchen

Yesterday I decided to make pureed vegetable soup. The first time we took the Mini Fashionista to Europe she spent the first week eating primarily fruit, bread and banana chips...that was until we got to this fantastic hotel in the Dolomites that had a pureed vegetable soup just for kids. She devoured it every night. 

With her tastes being somewhat difficult these days, especially at dinner time, I decided to see if the pureed vegetable soup was still a winner. 

I didn't follow a recipe, but I did find this great post from Epicurious that serves as a recipe for those of you that need one. 

Basic Instructions
- Sauté onion in chosen oil (I used butter) until soft
- Add garlic and sauté for another minute or two
- Chop all vegetables (I used butternut and delicate squash, turnips, carrots, potatoes and broccoli) 
- Add vegetables and stir for a few more minutes. I also added a little white wine (an opened bottle) and deglazed it. You can easily skip this step. 
- Add herbs (I added a sprig of thyme and a few rosemary) and salt and pepper
- Cover with water and simmer on high (covered) until all vegetables are soft. 
- Remove herbs before blending
- Blend (I used an immersion blender which is much easier than transferring to and from a blender)
- Add coconut milk or cream to thicken 

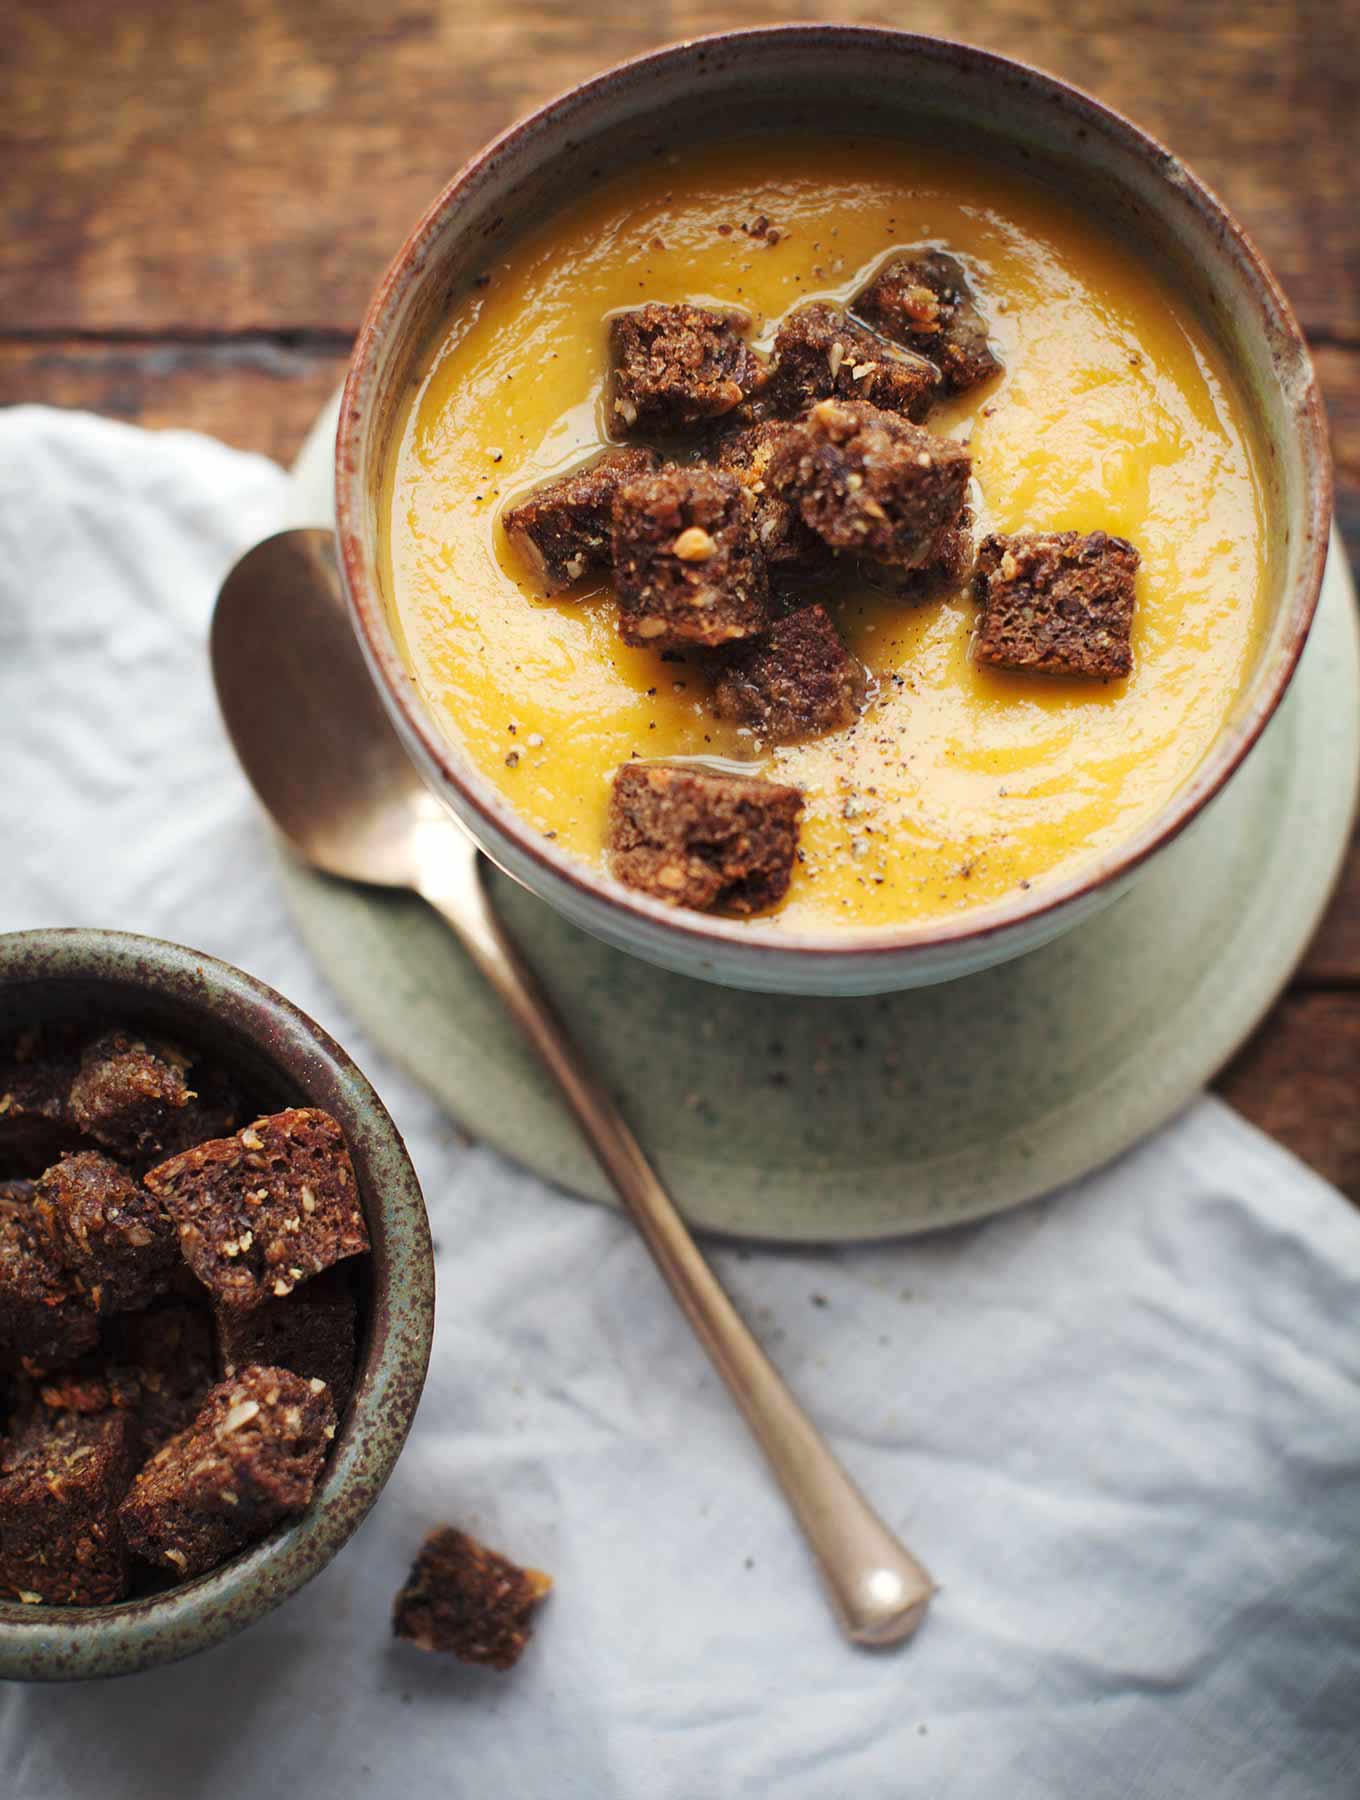
Here's what my soup looked like. We took a stale baguette and made some garlic croutons that we served on top.

So grab all of the veggies out of your refrigerator and try this! Unfortunately the Mini didn't love it as much as she did in Italy, but she ate it...somewhat willingly. 

October 18, 2016

C&C in the Kitchen

Sometimes we cook with white flour and sugar, and it's not healthy, but it's good. Really good.

This pumpkin chocolate chip cookie recipe is one of my all time favorites. These cookies are delicious and moist (does anyone else hate that word??) and perfect for the dreary fall days.

Pumpkin Chocolate Chip Cookies
2 cups all-purpose flour
1 1/2 teaspoons baking powder
1 teaspoon soda
1/2 teaspoon salt
2 teaspoon ground cinnamon
1 tbs pumpkin spice (or more if you really like pumpkin flavor)
2 eggs
1 cup sugar
1/2 cup canola or corn oil
1 cup canned pumpkin
1 teaspoon vanilla extract
1 cup chocolate chips, or any chip you like

Directions
Preheat the oven to 325 degrees F.

Stir the flour, baking powder, baking soda, salt and spices together in a medium bowl and set aside. In a large bowl, using an electric mixer on medium speed, beat the eggs and sugar until smooth and lightened in color, about 1 minute. Stop the mixer and scrape the sides of the bowl as needed during mixing. On low speed, mix the oil, pumpkin, and vanilla until blended. Mix in the flour mixture to incorporate it. Mix in the chips.

Scoop mounds of the dough onto baking sheets (about 1/4 cup per cookie), spacing the cookies at least 2 1/2-inches apart. Use a thin metal spatula to smooth and flatten the rounds.

Bake the cookies one sheet at a time until the tops feel firm and a toothpick inserted in the center comes out dry, about 16 minutes.

October 5, 2016

C&C in the Kitchen

Tis the season for everything Pumpkin. If you've been to Trader Joe's lately, you know what I'm talking about. It's as if pumpkin products have exploded all over the store....no complaints from me though. 

We've been enjoying pumpkin pancakes and waffles and these Paleo Pumpkin muffins that we have made twice in the last few weeks. They are Mini Fashionista approved, so I thought we should share them with you. The Mini helped bake them. 

She was in charge of greasing the pan with coconut oil.

And the finished product!

Ingredients
  • 1 cup pumpkin puree
  • ¼ cup melted coconut oil
  • 1 ripe banana
  • 5 organic, free-range eggs
  • 1 teaspoon baking soda
  • 1 teaspoon vanilla
  • 1 tablespoon of pumpkin pie spice (or more if you like)
  • ½ cup coconut flour
  • 1/4 coconut sugar or maple syrup (optional for sweetness)-not Paleo if you add this
  • ¼ cup pecans, chopped (optional for topping)
Instructions
  1. Preheat oven to 400 degrees.
  2. Add pumpkin puree, coconut oil, and ripe banana to a food processor and process until smooth.
  3. Add the eggs to a large bowl and whisk until frothy.
  4. Add the pumpkin and banana puree mixture to the bowl with the eggs and whisk until smooth.
  5. Add the baking soda, vanilla, pumpkin pie spice, and coconut flour and sweater (if using) and whisk until smooth.
  6. Grease a muffin tin with coconut oil (I used Trader Joe's coconut oil spray) and fill each tin with the muffin mixture.
  7. Sprinkle pecans (if using) over the top.
  8. Bake for 13 -15 minutes, or until lightly browned and set in the middle.
  9. Store in tinfoil or plastic wrap. Muffins will last a few days. 

June 13, 2016

C&C in the Kitchen

Thanks to my friend Traci, rice cakes have been on repeat in my kitchen lately. Who knew you could do so much with them?

Breakfast.....peanut butter (or any type of nut or seed butter) + fresh fruit....any kind of fruit. You could add a little honey too if you wanted. This has been my go-to for the last few weeks. It's so tasty, especially with the fresh berries I picked over the weekend. 


Lunch...pile on the avocado and add whatever toppings you want. Here I chose turkey, tomatoes and cucumbers.

 And here, avocado, radish and micro greens.

I've also eaten with avocado and egg. Really you can't go wrong with any of these combinations!

March 22, 2016

C&C in the Kitchen

Organization makes me happy. For the most part my kitchen is well organized, but I have been bothered by the way my cutting boards, baking sheets, cupcake pans, etc have been stored since we moved into this house over 6 years ago.

Finally I did something about it. Last week I purchased two of these Seville Classics Kitchen Pantry and Cabinet Organizer, and finally I am at peace!

Here are the product photos from Amazon.


And here is what they look like in my kitchen. Doesn't that drawer just make you happy?

February 22, 2016

C&C in the Kitchen

After a recommendation from my BFF, I decided to ditch our very old cutting board and trade it in for a newer model. 

The Epicurean Gourmet Series Cutting Board is pretty awesome! They are made in the USA of natural wood-fiber laminate, have a nonporous surface that won't dull your knives, and it prohibits bacteria, odors, and staining! 


And they are dishwasher safe...a must in my household!

Do you have a favorite cutting board? So far I've been really happy with this one, and I'm already considering getting another in a different size!

September 28, 2015

C&C in the Kitchen

Tuesday marked the first day of fall which means tis the season for pumpkin everything, pumpkin cookies, bread, smoothies, cake...you get the picture.

Canned pumpkin is back on the shelf at Trader Joe's, and last week I decided to try out a new "healthy" pumpkin bread recipe. I took this recipe and adapted it into my own, much healthier version. 

Greek Yogurt Pumpkin Banana Bread

Ingredients
1½ cups gluten free flour
1 tsp. baking powder
½ tsp. baking soda
1 tsp. cinnamon
1-2 Tbs pumpkin pie seasoning (depending on how flavorful you want it)
½ tsp. sea salt
2 eggs, lightly beaten
1 large, ripe banana
½ cup pumpkin puree
½ cup plain Greek yogurt
1 Tbs maple syrup or coconut sugar (you can use up to 1/4 cup if you don't care how "healthy" it is)
Optional add-ins: chocolate chips, nuts, Trade Joe's seeds blends, cranberries, etc.

Instructions
- Preheat your oven to 350ºF, and lightly grease a 9 x 5 bread pan. Set aside.
- In a large mixing bowl, combine flour, baking powder, baking soda, spices, and salt. Stir until well combined and set aside.
- Lightly beat the eggs in a medium sized mixing bowl. Add mashed bananas, pumpkin, Greek yogurt, maple syrup or sugar, and vanilla. Stir until well combined.
- Pour the wet ingredients into the dry ingredients and stir gently. Do not over mix. Fold in your optional items (I added Trader Joe's seed blends)
- Pour the batter into the loaf pan, spreading it out evenly. Then I added more Trader Joe's seed blends (hemp, chia, etc.). Bake for 60 minutes, or until a toothpick comes out clean. 

Here's what my bread looked like! I'll be honest...it's not the most amazing pumpkin bread you've ever tasted (it's better with more sugar), but it is moist, flavorful and it's made from all good things! So, when you need a pumpkin fix and you want something healthier than the pumpkin muffin at Starbucks, try it! 


July 23, 2015

C&C in the Kitchen

Early sunday morning the Mini Fashionista and I were enjoying some time together when we realized that our bananas were looking pretty tired. So I asked her what she wanted to bake with them, and her response was "banana bread."

I've made this Paleo Banana Bread recipe a few times before and have since altered it slightly into my own recipe (below). This bread is spongy and moist and totally delicious. And what I love most about it is the complete absence of any sweetener besides the bananas! In the words of the Kix commercial, this bread is "kid tested, mother approved".

Happy Baking!

Spongy Banana Bread
Ingredients
4 ripe bananas
4 eggs
1/2 cup almond butter (or other kind of butter such as coconut, sunflower, peanut, etc)
4 tablespoons melted coconut oil
1/2 cup coconut flour
1/2 cup almond meal
1 tablespoon cinnamon
1 teaspoon baking soda
1 teaspoon baking powder
1 teaspoon vanilla
pinch of sea salt
chocolate chips, walnuts etc. (optional)

Instructions
- Preheat oven to 350F
- Combine bananas, eggs, nut butter and coconut oil into a mixing bowl and mix well. I used a Kitchen Aid mixer and suggest that or a handheld mixer.
- Add in coconut flour, almond meal, cinnamon, baking soda, baking powder, vanilla, and sea salt and mix well.
- Pour into a week greased loaf pan (I used coconut oil spray to grease my pan)
- Bake for 55-60 minutes or until a toothpick inserted into the center comes out clean
- Remove from oven and flip your bread out onto a cooling rack

June 9, 2015

C&C in the Kitchen

You may remember from my previous post that the Trader Joe's Cilantro salad dressing is a favorite in our house. As far as salad dressings go, it could be worse, but as with nearly everything that is packaged, it could be better.

My college roommate sent me a photo of her daughter eating a big bowl of greens with cilantro dressing. It was inspired by this photo that was in my recent "Healthy Eating" post (here).

Her dressing was homemade, and it inspired me to ditch the bottled dressing and make it from scratch using the recipe she sent me from The Garden Grazer.

Creamy Cilantro-Lime Dressing

Ingredients
1 cup loosely packed cilantro, stems removed and roughly chopped
1/2 avocado (or 1/2 cup plain coconut or Greek yogurt)
2 Tbsp. fresh lime juice (about 1/2 lime), more to taste
1-2 garlic cloves
1/4 cup olive oil
1 1/2 tsp. white wine vinegar
1/8 tsp. salt
Recommended: cumin, honey/agave

Directions
Puree all ingredients in a blender or food processor until smooth.
Taste and adjust seasonings if necessary.
Recipe yields 3/4 cup dressing

I served the dressing on Sunday over a quinoa salad with green onions, bell peppers and cilantro. It was a hit. I highly, highly recommend it. It's definitely going to become a staple in our house.

Now the real test is seeing if the Mini Fashionista likes it as much as she does the bottled version from Trader Joe's. I won't hold my breath. 

May 28, 2015

C&C in the Kitchen

Last year I bought a spiralizer, and for nearly a year (I bought it in July) it has been sitting on the shelf, in the box and unopened. I've had gadget guilt for nearly an entire year, and finally I decided to do something about it.

In case you are wondering which Spiralizer has been sitting on my shelf for the last year, this is it, The Paderno World Cuisine A4982799 Tri-Blade Plastic Spiral Vegetable Slicer.

Earlier this week, I FINALLY used it to make THAI SWEET POTATO NOODLES WITH CRISPY BAKED TOFU.

The Mini Fashionista turned the crank while I helped to progress the sweet potato forward into the blade.

Here is what our "noodles" looked like coming out.

These were all my ingredients for the dish. I added a yellow and orange pepper to the recipe.

This is what the dish looked like before adding the sauce.

And here it was on my plate!

I will definitely be using my spiralizer again soon! Even my +1 liked the "noodles", and he's not a big fan of sweet potatoes!

And if you are looking for recipes to make more frequent use of your spiralizer, check out Inspiralized!

April 30, 2015

Keeping it (eating) Healthy for Your Kids

Over the weekend I posted the following photo on my personal Instagram account with the caption "Parenting success= 4 year old willingly eating steamed greens, navy bean and veggie soup and a smoothie." 

One of my friends commented "Teach me your ways, oh wise one".

It got me thinking, and the thinking evolved into this post on "keeping it (eating) healthy" for your kids. Currently, Katie and I are both participating in a 6 week "reboot" with our life long friend and dietitian, Katie K (post here for all the details). One of the dialogues happening in our "reboot" group is about kids and healthy eating, so the timing of this all seemed serendipitous. 

We talk a good bit on C&C about diet and exercise. We share our favorite healthy (and sometimes not so healthy) recipes, and we talk often about how we integrate these things into our daily lives, but never have I addressed how to encourage healthy eating for kids. 

And I will say, my kid eats pretty darn well. 

So, how do we do it?

First, let me begin with some historical perspective. Up until about a year ago, we had "snacks" in our house; goldfish crackers, banana chips, bunny crackers. You know the "snacks" I'm speaking of. Then, during the barre3 Spring challenge, I decided to "cut the crap" out of my diet and get rid of nearly everything processed and containing sugar. The decision was as much for me as it was for the Mini Fashionista. With that, nearly all "snacks" left our house and have pretty much remained off our shelves since.  

So my first tip...

1. Cut the Crap- This is probably the hardest and the easiest step you will make towards healthy eating for you and your children. It's hard because you may find it difficult to imagine your pantry without these things, but it's easy because once they are gone, they are gone. Once you take this step, it's up to you to fill your fridge and your kitchen with healthy choices, which will be the only choice when the crap is gone. By ridding your life of processed and packaged foods you will open up space mentally and physically for nutrient dense, whole foods. And read labels. There is sugar in nearly everything that comes in a package.

This is what the Mini's lunch looks like on an average day. I give her all whole foods. Usually there is fruit in her lunch for something sweet. I'm guessing she had an orange or apple on the side this day. And that's not ranch dressing. It's Trader Joe's cilantro salad dressing, her favorite! She doesn't even know what ranch dressing is because it's loaded with sugar, and therefore not in our house.

2. Start Small- I realize for most people big changes are daunting and unattainable, so I recommend starting small. Say your goal is to get your kids to eat more veggies? Think of ways you can integrate veggies that doesn't cause total rebellion and meltdowns. For us, that started as a daily smoothie. Each morning the Mini drinks at least one smoothie (sometimes 2 or 3 throughout the day) with organic carrot juice (Costco), tons of greens (that I freeze), Greek yogurt, frozen fruit, hemp or chia seeds and a banana. If she didn't eat any vegetables the remainder of the day, it wouldn't matter

3. Plan Ahead- I'm assuming that most of you are busy and nearly always on-the-go, which makes it hard to eat well. It takes planning and preparation to have healthy food when you are away from home. If I know we are going to be out and about most of the day, I pack a cooler bag with my lunch and snacks and the Mini's lunch if she is not going to school. Things I bring with me might include, cut veggies, fruit, nuts, Larabars and leftover smoothies. 

This photo is from a car trip to Idaho. We packed all of our food so we didn't have to stop for "fast food". The Mini is eating a pickle, tofu and apples. 

4. Cut the Snacking- Kids often don't eat the meal they are offered because they are too full from snacks eaten just prior to a meal. If kids are hungry enough, they will eat. So when your child is asking at 4:30 p.m. for a snack, say "it's okay to be hungry. We are going to have dinner soon." And if they MUST eat something, offer fruit, vegetables or some nuts. 

5. Keep trying- Kids are finicky. One day they like avocado and the next they hate it. For that reason, you have to keep giving them the foods they refuse. We have a "one bite" rule in our house. The Mini has to take one bite and if she doesn't like it, then she doesn't have to eat anymore. A few nights ago we were at a friend's house for dinner and their son was eating raw bell peppers. The Mini originally said she didn't like peppers, but after trying one, she realized that it wasn't so bad. And just the next day she requested peppers in her lunch and for dinner.

6.  Lead by Example- You can talk until your blue in the face about the importance of eating healthy and fueling your body with good fuel, but if you don't actually do it yourself, they will never truly understand the importance. Actions speak louder than words. I try to eat some sort of vegetable at every meal, and try to get the Mini to do the same. 

7. Teach moderation- There is nothing wrong with eating sugar and things that are "bad" for you, but it's important to do it in moderation. We make sure that the Mini has eaten nutritious food before she is offered a "treat". The last thing you want is your kid to be the one binging at a birthday party because they feel deprived at home. The Mini is a lover of pudding cups, dark chocolate and ice cream. All of these things she gets, but not on a daily basis. 

8. Involve your kids in meal planning, shopping and cooking- Every week we get a CSA (community share of agriculture) from a local farm. When the box arrives, the Mini helps me unload it. We talk about what each item is, smell it and put it away. She also loves to help my husband and I cook. Encouraging your children to be a part of the process will help them feel more connected to the food they are eating. We have even visited the farm to see exactly where our veggies are coming from. 

I would love anyone's questions, comments and feedback on this post and topic!